Sunday, May 27, 2012

Thunderhawk Scratch Build


I am sick, so I spent the day cutting card stock, using vast amounts of liquid green stuff, and making the hull of this monstrosity. I wasn't even sure I was serious about building it while I was building it. I guess the question now is whether or not I should finish it.

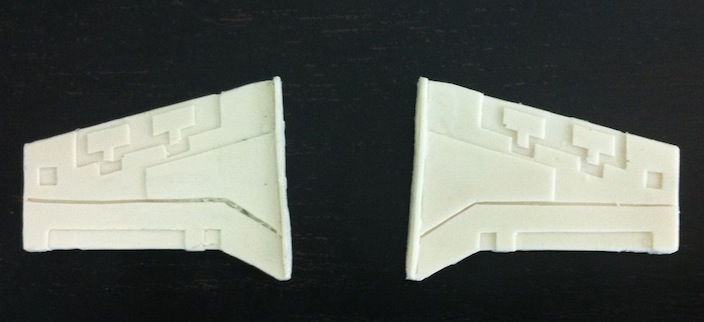
In these images you can see the green stuff and tape, which still need sanding off. Question is, do I keep going? If I am still sick tomorrow, I could probably make the tail and wings.

EDIT

I decided to give the thunderhawk chassis a lick of paint to see how it would turn out. I dropped it on its nose, and broke part of it, but heh, what is a little more battle damage. I still haven't decided what to do with this thing.

Saturday, May 26, 2012

Custom Cast Canards


Normally when I scratch build, I get so tired of cutting plasticard, that ultimately my models look pretty bad. Rather than acquiesce to that this time around, I decided to look for a new way to make parts. I think I may have found it.

  1. Create your stencils as usual.
  2. Print your stencils out on card stock. This will give them a little heft. Print out enough complete sets that the stacked card stock will be as thick as  your thickest part.
  3. Laminate two sets of your stencils. Fedex had a laminating machine that I was able to use. The laminated stencils provide enough height to make surface details stand out.
  4. Build your model, saving the laminated parts for surface details, or areas where card stock is too fragile.
  5. Use liquid green stuff to fill in the edges where stacks of card stock meet. The finished part can be sanded, but it is easier to fill in the most egregious holes before you cast. 
  6. Mold and cast your part.
  7. Build whatever it is your are building....or two of them.....or maybe just a crashed one to make scenery. 

So my plan was to make a Thunderhawk using this technique, but that will take forever, and I will not be able to show it off. What about customizing a storm raven into a mini t-hawk/storm bird like design.

What do you think? If I stick with custom parts for a unique design, then I will be able to make any number of these things. 

Wednesday, May 16, 2012

1st Edition 40k


Something great came in the mail today. Way back in 89 this was the book that hooked me on warhammer 40k. My original copy has long since deteriorated beyond recognition. So when I saw a copy on eBay I had to buy it.

I am glad squats are gone from the game, but I still like some of the art!

Sunday, May 13, 2012

To Buy Or Not To Buy...A Metal Thunderhawk


I've wanted to build/buy/ebay acquire, a space marine thunderhawk for some time. When a metal thunder hawk came up on ebay I considered the purchase. I remember really liking the model, but as the all metal hobbyist torture kit on ebay was not built, it was hard to see what the final model would look like. There are so few photos of these things around, they might as well be white whales. Rather than plunk down enough money to buy a forgeworld resin thunderhawk on an unknown ancient metal quantity, I decided to take some plans I found online to make the original one, and see how it would look in my collection.

Good thing I did.

I have no idea why I thought the metal one was cool. It is not. The forgeworld thunderhawks are so much better it is not even worth collecting the metal one. (unless you are into hobby torture...in that case all yours!)

Does anyone like the old model? Outside of the marine gunners in the wing tips, there is not much I like about it.  I would not buy an RTBO1 Beaky marine either, so maybe there is a limit to the nostalgia.

Monday, May 7, 2012

Abbadon 2.0

I did some work on Abbadon's base that I think worked out fairly well. I started with the plastic Chaos terminator lord base, added some rhino junk, and then used the new texture paint to fill in all the spaces in-between the rubble. The texture paint worked out quite nicely, but the down side is that I used nearly 1/2 a pot of the stuff. I just don't see how texture paint is economical, and this is coming from a guy who buys everything GW makes!

I still need to paint quite a few parts on Abbadon. I was thinking of giving him a glowing green sword to match the deamons I planted up earlier. I think green might look nice with the purple cloak that has not been added yet. After that and I get to weather up the base and his feet, and then put down some brown static grass.

Also, my wife picked up some white poster board which I used as a backdrop for the photo. What do you think? It feels a little weird to me to not see the mini with a background, but the detail does look clearer than before.

EDIT --It is late here, so the photos are not perfect, but I decided to go with the red daemon sword and purple cloak.


Sunday, May 6, 2012

Abbadon Finecast / Plastic Hybrid Painting WIP


A while ago I cut up my finecast Abaddon in an effort to up-scale him. The finecast mini has a lot of really interesting detail, but is a bit small for the Warmaster himself. I took a break from cleaning my 'office' (mostly miniatures) today and decided to put down a few licks of paint. Now when I chopped apart my original Abaddon to make this guy, I left his torso and head alone. Though small, I wanted no ambiguity as to who this figure represented. Now that his head is painted and am I am ready to attach it to the mini, I find that the model just does not fit. Did anyone else experience this when they put their Abaddon together? i suppose a little finecast surgery is now in order, but I had to do that after painting so much of him.